

How To Install Canon Tr8520
Description
Use the Easy Wireless Connect Method to connect the PIXMA TR8520 to a Windows PC.
Solution
View the video, or skip to the written instructions below to learn how to complete the Easy Wireless Connect setup.
 Connect your printer to your figurer - Video
Written Instructions
 These instructions are for aWindows computer. If you lot have a Mac, refer to gear up the printer for a Mac® .
There are two parts to this setup:
- Offset the setup process on your printer.
- Download and run the setup file on your computer.
1. Get-go the process on your printer
-
Turn the printer ON. If the printer is performing cleaning, print head alignment, or some other process, expect for it to finish.
-
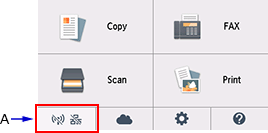
Tap the Network Status push (A) on the printer.
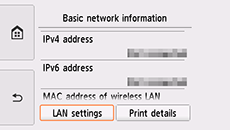
- Tap LAN settings on the Basic network information screen.
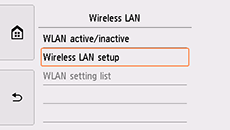
- TapWireless LAN.

- Tap Wireless Lan setup.
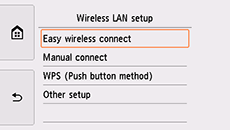
- Tap Piece of cake Wireless Connect, then tap Yes.
- When the printer grooming is complete, you will run across this screen:
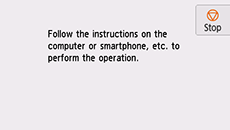
- Return to the setup application screen and go on with the setup.
2 Download and run the setup file on your calculator
-
First you will need to go the setup file (set up up tin can likewise be performed by using the Setup CD-ROM).
-
Read the data and annotation how to run the setup file. If set doesn't first automatically, click the Download button.
-
Select Offset Setup on the first screen.
-
Select the region where you alive, then Next.
-
Select Yeah on the license agreement.
-
Select Agree or Do Not Agree to the survey, then Next.
-
Select Yes on the Connection Method screen.

-
Setup continues. If the Select wireless router screen (below) appears, select the wireless router to connect to the printer, enter theNetwork Central (password) and selectSide by side.
The screen beneath may not appear. If it doesn't, get to the next step.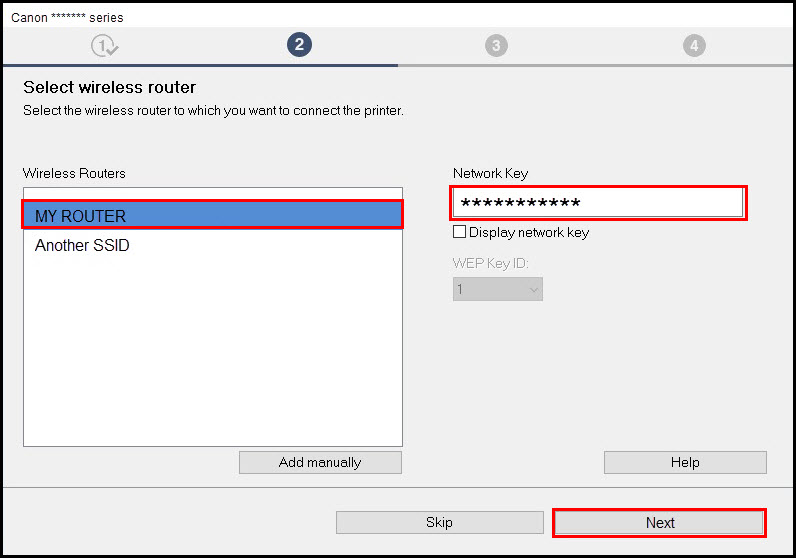
-
The network connectedness is complete. SelectSide by side.
-
The drivers will install. Select Get-go to print a test page or Next to proceed.
-
Select Next from the Setup Complete folio.
-
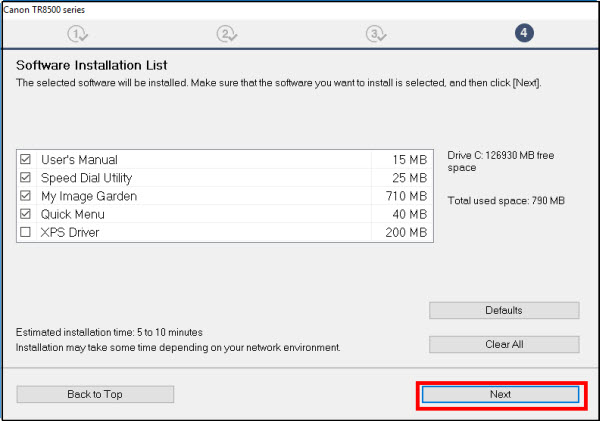
Select whatsoever optional application software desired. SelectNext.
-
SelectNext.
-
SelectExit and your setup is complete.
If your product result was not resolved after following the steps higher up, or if you crave additional help, please create or log in to your Canon Account to see your technical support options.
Or if you however need help, visit our Canon Community by clicking the button below to go answers:


Source: https://support.usa.canon.com/kb/index?page=content&id=ART168045
Posted by: warfieldtonts1978.blogspot.com
0 Response to "How To Install Canon Tr8520"
Post a Comment